Friday, May 30, 2014

Inspired Stamping - Free Style

Stamping Technique #11 - Free Style

This post will wrap up the Inspired Stamping series.  I used all the current papers for the 3D flip stand project, but didn't have a specific technique for this one, so I'm calling it Free Styling. =P


The last page features the Ivy Lane papers and I placed it in the back of flip stand.  I used a favorite retired stamp to stamp the image onto Colonial White Cardstock (which I cut out) and then the sentiment directly onto the B&T paper. Because it is a darker tone than the green B&T, it stands out.  So don't think you have to stamp on just cardstock!

Happy Stamping!!


Featured Products:

Ivy Lane Paper Pack
- Vineyard Berry Stamp Pads
Corner Rounder Micro-Tip Scissors
- 3D foam tape & tombo adhesive


NOTE: To see all the series of Inspired Stamping posts, click on the LABEL title 3D Project on the right hand side bar.

Thursday, May 29, 2014

Last Chance for May Promotions!!

Count down until these promotions are GONE!!

May National Scrapbooking Month Paper Pack - Free to Be Me for $5 with a $50 purchase:


Rediscover Beauty FREE download:

These will no longer be available after May 31st!!  SHOP NOW

Wednesday, May 28, 2014

Inspired By Blog Challenges - Color Dare #95


Getting inspired and crafty again with another blog challenge this week.  This is one I have missed participating in and really helps get my creative mojo flowing.  Color My Heart's Color Dares are super fun!!  

Color Dare Challenge #95 features the Close to My Heart colors of Sunset, Olive & Lagoon. With many graduations upon me, I used this color pallet as my inspiration for one.


Thanks for stopping by - Happy Scrapping!!


I am a winner for this blog challenge!! :)
Carmen Mitchell's photo.

Featured Products (all from Close to My Heart - SHOP HERE):

  • Paradise Assortment Baker's Twine
  • Polka Dot Embossing Folder
  • Olive, Sunset, & Lagoon Cardstock
  • Olive & Sunset Stamp Pads
  • Artiste Cricut Cartridge
  • Perfect Fit-Dad Stamp Set
  • Art Philosophy Stamp Set
  • White Daisy Value Card Pack
  • 3D Foam Tape

Tuesday, May 27, 2014

Ivy Lane Loves Embossing

The Ivy Lane Card Workshop on the Go (WOTG) kit is one of my favorite WOTG's in a while!
The paper pack alone is stunning - my grandma told me (as she got one of the cards for Mother's Day), "this is one of my all time favorite and prettiest cards you've given me." *blush* #thrilled!

I am not one to stick to patterns.. I always like to change them up and see what else i can do with them.  So here some inspiration on how to enhance the Ivy Lane Cards.  


Subtle changes to this one - the WOTG pattern is the bottom left card.  To change it up, I used the Close to My Heart embossing folders to add some texture to the Hollyhock cardstock pieces.  Because CTMH's paper has a white core, there is some natural distressing going on when you emboss!  You can see it in the Damask pattern above.

I also added in the Bronze Shimmer Trim to compliment the kit.  The Gold Shimmer Trim is awesome & limited to this kit ONLY.  Can't wait to use it on some other projects!  The other accessory I added in were the Pink Glitter Gems as additional bling.


Again, the top left card is the WOTG style - I changed up the others either by swapping out the gold shimmer trim with the Bronze or the sequins with the pink glitter gems.  I also used the back of the floral paper on the bottom left card for something different.  Additionally, I rounded the corners on some of them too.
 

These turned out to be my favorite of the three cards.  The top left card is the WOTG pattern, unaltered.  I embossed three of the brown pieces, which you can see above - it really spruced them up! Supplementing in the Rosewood Collection mini-melody accents really blingged it up!

LMK if you have any questions & hope you enjoy this card kit as much as I did.  Don't be afraid to change it up!


Happy Scrappin'


WOTG Ivy Lane Cardmaking Kit - $24.95

PRODUCT DESCRIPTION

Use the materials, kit-exclusive accessories, and instructions in this kit to create 15 beautiful cards (5 each of 3 designs) inspired by Jeanette Lynton!


Included in the kit:
1 – My Acrylix™ Ivy Lane Cardmaking Workshop Stamp Set (D-size)
2 – Ivy Lane B&T Duos™ Papers
4 – Cardstock Sheets (1 Cocoa, 2 Colonial White, 1 Hollyhock)
15 – Colonial White Cards & Envelopes
1 – Sequin Dot Assortment (24 each of 4 colors)
1 – Gold Shimmer Trim (5 yards)
1 – Instructional Brochure


Some basic tools you may already have, such as inks, stamp blocks, or tools are needed to complete this project.

Sunday, May 25, 2014

Inspired By Blog Challenge - FMS #137 & ColourQ #242


I'm trying to get back into the swing of things and scrapping for myself!  So with that in mind and a handful of graduation cards to make, I got inspired by this week's Freshly Made Sketches #137 pattern & the ColourQ #242 color combo.

Thanks for stopping by - Happy Scrapping!!


Featured products (all Close to My Heart products - SHOP HERE):
  • Lollydoodle B&T paper
  • Pear & Lagoon cardstock
  • Sunset Ink Pad
  • Aqua Dots
  • Teal Shimmer Trim
  • May Stamp of the Month - You've Got a Friend
    • only available until May 31, 2014
  • 3D Foam Tape
  • White Daisy Value Card Pack

Saturday, May 24, 2014

Free to Be Me Workshop - NOW AVAILABLE!!

Free To Be Me
Workshop Guide


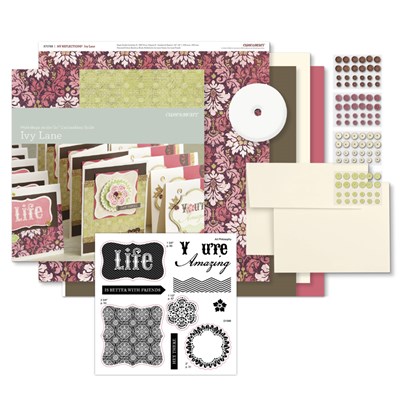
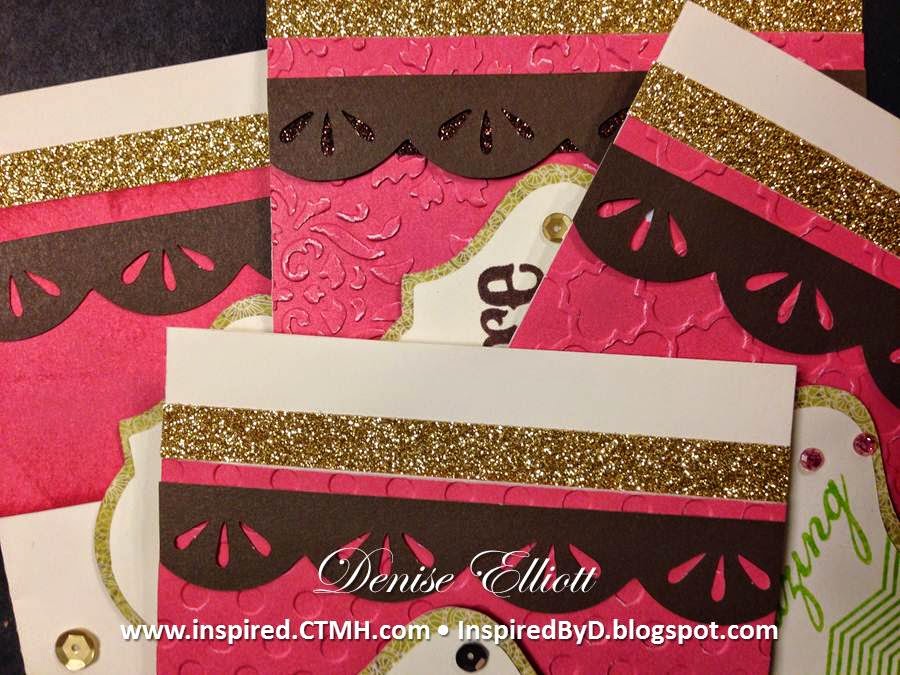
Create 3 12” x 12” 2-page layouts and 15 4.25” x 5.25” cards utilizing the 2014 May National Scrapbooking Month promotional paper pack, Free to Be Me, and additional Close to My Heart products.

Here's how this works:

Crafters:
Purchase the Basic Kit from one of us and you will receive the files (cutting guide, photos, tips, and the CCR files) emailed to you upon order confirmation.

Most crafters already have some of the supplies, such as white card bases & 3D foam tape. If you have these already, you can substitute them out for any of the Best Kit or Recommended Items, making it at least $50 before the Free To Be Me Paper Pack can be added.

Purchasing ALL products in the Basic and Best Kits (or ordering additional items totaling $150+ before tax and S&H), will qualify you for $25 of FREE PRODUCT (Hostess Rewards).  Contact us BEFORE you submit your order to qualify for this!


Workshop Supply List:
1)   Basic Kit Items - $56.65*:                         Item #:             Item Cost*: 
·         Red Shimmer Trim                                    Z1848                   $4.95
·         Teal Shimmer Trim                                   Z1918                  $4.95
·         Aqua Dots                                                  Z1853                  $3.95
·         Durable Triangle Studs                              Z1928                  $3.95
·         White Value Card Pack                             X254                    $14.95
·         3D Foam Tape                                           Z1151                   $5.95
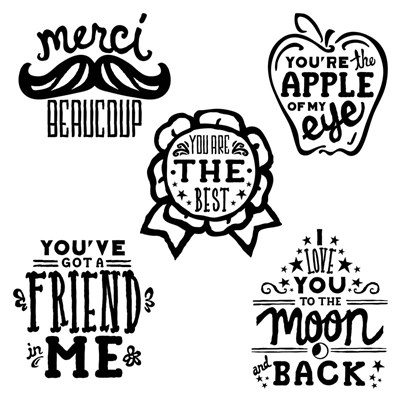
·         Casual Expressions Stamp Set                   D1525                  $17.95

·         Qualify for: Free To Be Me Paper Pack                                + $5.00*
·         Qualify for: You’ve Got a Friend May SOTM                        + $5.00*

2)   Best Kit Items (Basic Kit + $85.30*):        Item #:            Item Cost*:
·         Oodles of Doodles Stamp Set                  B1449                   $9.95
·         Holiday Tags Stamp Set                           D1560                  $17.95
·         Flight of the Arrows Stamp Set                D1578                  $17.95
·         Marquee Uppercase Stamp Set               E1029                   $29.95
·         White Daisy Cardstock                               1385                    $9.50

3)   Recommended Products:                         Item #:          Item Cost:
·         Ruby Stamp Pad                                      Z2170                   $5.25
·         Lagoon Stamp Pad                                  Z2195                   $5.25
·         Sunset Stamp Pad                                   Z2191                   $5.25
·         Bamboo Stamp Pad                                Z2103                   $5.25
·         Glue Dots                                                 1772                     $7.50
·         Micro-Tip Scissors                                  Z1836                   $13.95
·         Liquid Glass                                            Z679                      $6.95
·         Artiste Cricut Cartridge                         Z1790                   $99.00
·         Artbooking Cricut Cartridge                  Z1906                   $99.00
·         Make It From Your Heart Vol. 1               9035                     $7.95
·         Make It From Your Heart Vol. 2               9042                     $7.95
·         Scallop Border Punch                              Z1871                   $17.95
·         4" X 6" Flip Flaps™                                  Z4114                     $3.95
·         Blocks
·         Adhesive
·         Computer and Cricut Craftroom
* cost does not include tax and S&H

CTMH Consultants:
Purchase a minimum of $30 of any CTMH products from my website www.inspired.CTMH.com and receive the files (cutting guide, photos, tips, and the CCR files) emailed to you upon order confirmation. Consultant release conditions apply upon receipt of the workshop guide and associated files.

If you have any questions, please let me know!


This workshop was co-designed by:
Designed by Denise Elliott, Close to My Heart Independent Consultant
www.inspired.ctmh.com • www.inspiredbyd.blogspot.com • www.facebook.com/inspired.by.d

Designed by Jen Patrick, Close to My Heart Independent Consultant
www.roxybonds.ctmh.com • www.roxybonds-scrappin.blogspot.com • www.facebook.com/roxybondsCTMH

Inspired Stamping - Back to Front

Stamping Technique #10 - Back to Front

This is another simple technique but it only works with symmetrical stamps.

I placed the HELLO TODAY stamp on my block so the back of the stamp was face up.  I inked it in Hollyhock ink and stamped the circle onto my cricut cut circle.  Cleaned it and then turned the stamp around so the HELLO TODAY image was on the outside (like normal).  Inked in Outdoor Denim, I stamped on top of the Hollyhock to get the final outcome above.

This technique easier and gives a different textured look than sponging or blotting the cut on a stamp pad.

Happy Stamping!!


Featured Products:
Ariana Paper Pack
- Reel Life stamp set - D1555
- Hollyhock & Outdoor Denim Stamp Pads
Durables Triangle Studs
Corner Rounder Micro-Tip Scissors
- 3D foam tape & tombo adhesive


NOTE: To see all the series of Inspired Stamping posts, click on the LABEL title 3D Project on the right hand side bar.

Friday, May 23, 2014

Dream Pop Bracket Frame

I decorated this bracket frame with a retired paper pack (Dream Pop).  Lots of Cricut cuts here!  Very simple and fun to do.  It will hold a 5x5 photo in the center.


It came together fairly quickly and utilizing Artbooking for the bracket frame template was a breeze!

If you order the Bracket Frame from me, I will send you the Cricut Craft Room file for it for FREE.  Saves you the trouble!

FEATURED PRODUCT:  My Creations Bracket Frame - 11" outer dimension; 7" inner dimension; 1" deep.  Item# Z1797 - $8.95 (plus tax & S&H)

Thursday, May 22, 2014

Rediscover Beauty in May

Have you downloaded your FREE Close to My Heart file this month???  It's super cute!


It's only available through May 31, 2014 - so get yours now!

Please note that the picture above is not the best quality - download the PDF file for the best print quality.

Wednesday, May 14, 2014

Discounted & Limited Product Bundles!!

Close to My Heart just released 5 product bundles that you can get at a discounted price!  These bundles are available until July 31, 2014. Order them from my website.
Essentials Toolkit Z9984 $71.05

Memory Keeping Fundamentals X9983 $133.40

Stamping Scrapbooker's Delight Z9982 $132.10

Cardmaker's Quick Start Z9981 $73.25

Stamping Basics Collection Z9980 $65.30

Thursday, May 8, 2014

Inspired Stamping - The Kissing Technique

Stamping Technique #9 - Kissing

Did "kissing" get your attention?!  Not a word you'd associate with crafting, but it is in fact a technique used in stamping!

I used the stamp set All the Details for this technique.  I inked the Real Life stamp in Pacifica and stamped it (1st generation on a scrap piece of paper, so I would get a lighter tone of the color).  I set this stamp aside.

Then I took the Plus Sign stamp (on a separate block from the other), inked it in Ruby and then kissed (stamped) it to the Real Life stamp.

Once I did this, then I stamped the Real Life stamp on the cricut cut & woo-la!  It gives you a patterned look without losing the integrity of the original design.

Happy Stamping!!


Featured Products:
Proplayer Paper Pack
- All the Details stamp set - D1555
- Pacifica & Ruby Stamp Pads
White Marquee Enamel Shapes
Corner Rounder Micro-Tip Scissors
- Art Philosophy Cricut Cartridge
- Red Shimmer Trim
- Chevron Embossing Folder
- 3D foam tape & tombo adhesive


NOTE: To see all the series of Inspired Stamping posts, click on the LABEL title 3D Project on the right hand side bar.

Sunday, May 4, 2014

May Stamp of the Month - You've Got a Friend

The May Stamp of the Month (SOTM) is You've Got a Friend.  Buy it at full retail price for $17.95* or earn it at a discounted price of $5* with a $50 order, before tax and shipping.

This bold and friendly stamp set will only be available through May 31, 2014.  Visit my website to get your SOTM today!! 


* = plus tax and S&H

Friday, May 2, 2014

Inspired Stamping - Combo of Techniques

Stamping Technique #8 - Combo of Techniques

For this stamping technique page, I did three different techniques.

The first technique is called the Tissue Technique.  I used this on the bird.  I stamped it Cotton Candy ink and then took a tissue (yup, just like the one you'd blow your nose with), and dabbed it on the stamp.  It gives the image a distressed look.  After I got the look that I wanted (I could SEE what it looked like because our stamps and blocks are clear!), I stamped the bird on White Daisy cardstock and then cut it out.

The second and third techniques used go hand-in-hand. One is the Masking Technique & the other is Spritzing.  For this one, I stamped the sentiment on a scrap piece of paper & cut it out. I then laid it down on the 2.5" x 2.5" piece of White Daisy cardstock and used the spritz pen (filled with some Sunset ink, Pearl Paint, & water- ask me for the ratio) to spray the color on it.  I removed the scrap piece of paper and it left that part white, allowing me to stamp the sentiment in the un-spritzed spot.

Spritzing can be done like above or just spritz to distress the base cardstock or any papers.  It's super fun and easy! I recommend cleaning out the sprayer when you're done.  You can leave the mixture in the sprayer, but the ink & paint will dry and clog the sprayer.

This is one of my favorite ways to spruce up a stamped image.

Happy Stamping!!


Featured Products:
Lollydoodle Paper Pack
- Happy Thoughts Stamp Set (retired)
- A1160 This is Good Stamp Set (hostess exclusive! ask me for details)
- Cotton Candy & Juniper Stamp Pads
- Sunset Reinker 
- Create-a-Shade Pearl Paint
Spray Pen
Lagoon Zipper Ribbon
Corner Rounder Micro-Tip Scissors
- 3D foam tape & tombo adhesive


NOTE: To see all the series of Inspired Stamping posts, click on the LABEL title 3D Project on the right hand side bar.